When most people think of hacking or cybercrime, they think about a team of people at their computers attempting to break into an organization. In the modern landscape, the attackers may already “be inside the house.” And though their actions may not be intentionally malicious, current employees may put an organization at risk inadvertently. The best way to address this is with DLP policies, security policies, and awareness training. Knowledge is power when it comes to prevention.
Let’s go through making an example DLP Policy for HIPPA Compliance in Microsoft Purview, Microsoft’s newest Compliance portal offering.
Data Loss Prevention
Today we will discuss Data Loss Prevention DLP policies and how they can ensure secure data is encrypted, watermarked, and or cannot be removed from the environment. If we browse to https://compliance.microsoft.com and then click on the Data Loss Prevention tab on the left blade, then click on Overview:
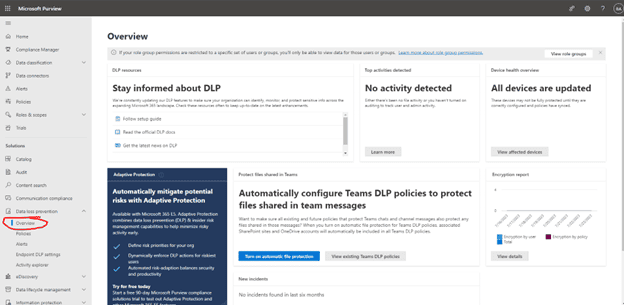
This screen will show us an overview of all the current DLP Activities, device health, and other overall widgets.
Policies
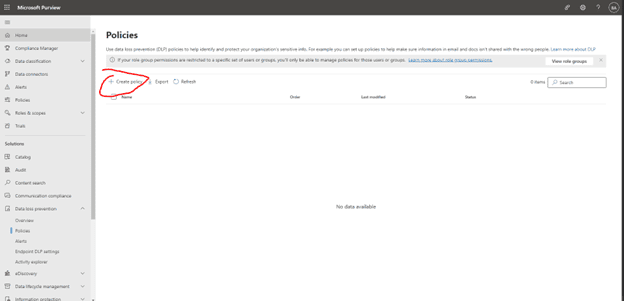
The next section underneath this covers the DLP Policies themselves. From here if we hit Create Policy:
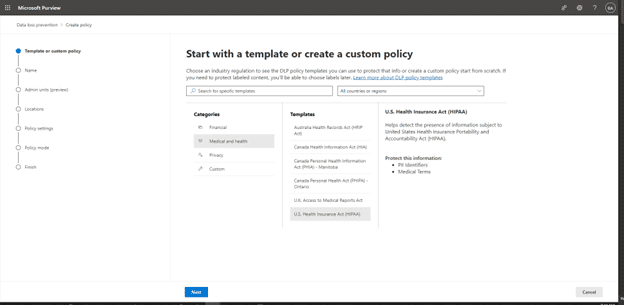
We can select from a predefined template for example if you need a template for US HIPAA Compliance; click on medical and health, then select U.S. Health Insurance Act (HIPAA), then we can see that it will protect all PII Identifiers and Medical Terms:
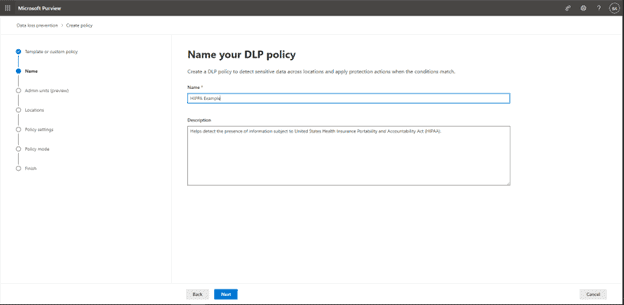
On the next screen, we can give it an original name and description:
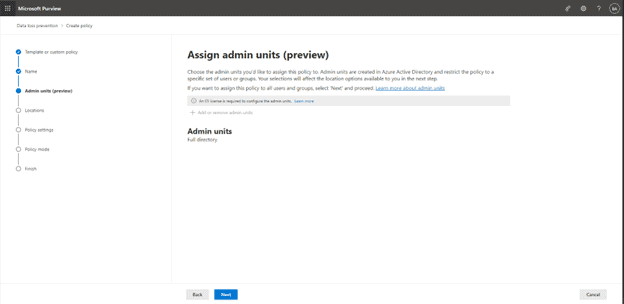
On the next screen we can see Assign Admin units, this allows us to target specific Admin units in Azure AD, but since it’s in preview (also requires E5 licensing), we will just skip this for the time being:
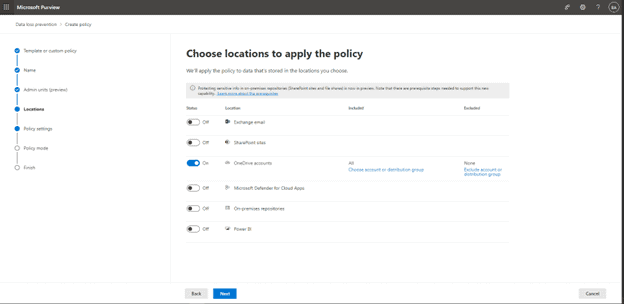
On the next screen we will select which Locations (Microsoft Services) to target with this policy. We can even get granular such as targeting specific distribution groups in Exchange, specific user accounts, or specific SharePoint sites. For this example, we will target all the OneDrive accounts. When rolling this out to production, I would strongly encourage teams to work with a pilot group of users and roll it out to groups individually in production:
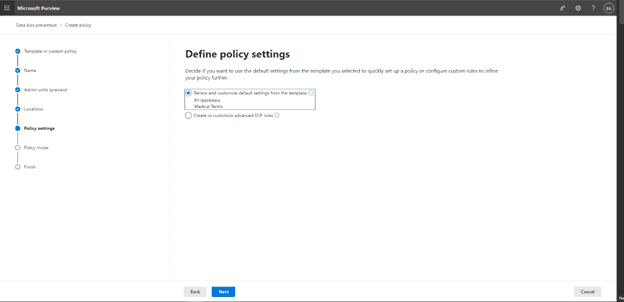
On the next Screen, we select Review and customize items from the template or can select Customized DLP rules. For the sake of our example, we will use the template:
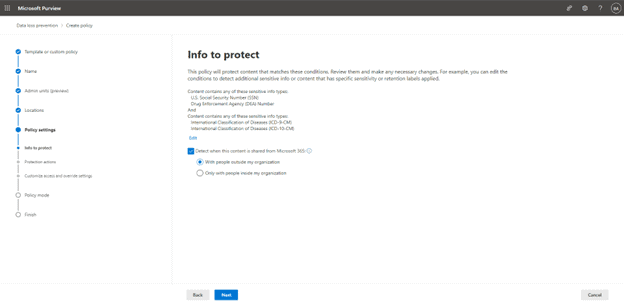
From here we select the information to protect, since we used the template, we are good with these selections and set to detect when this content is shared from Microsoft 365. We can use this for external or internal users, in this case, let’s target external, for example, if a user shared something from their OneDrive with a 3rd party:
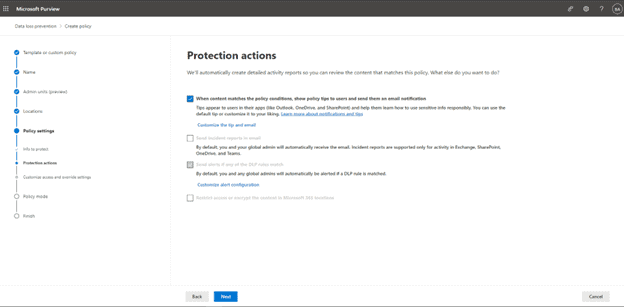
On next screen, we have Protection Actions. We are given options:
- Policy tips (small pop-ups informing the user of a violation) and also send them an email
- Send incident reports via email
- Send DLP alerts to admins
- Restrict Access to certain areas of Microsoft 365
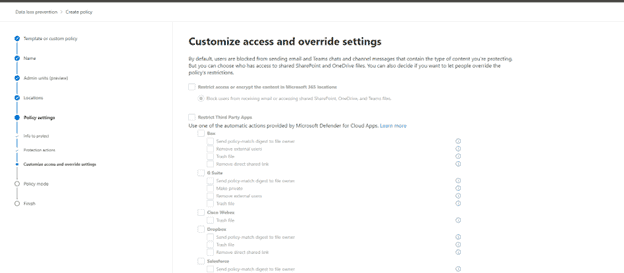
The next screen gives us options to Customize Access and Override settings, mainly to Restrict Access to content (E5 Licensing Required) and then 3rd party apps and what to protect within them (when connected to Microsoft defender for cloud apps).
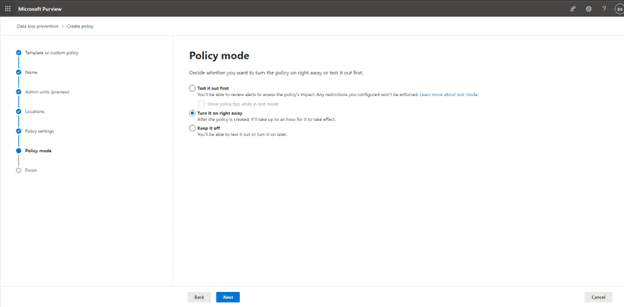
Then we set the policy mode:
- Test mode to test functionality
- Turn it on completely now (It will take at least an hour to take effect)
- Kept it off
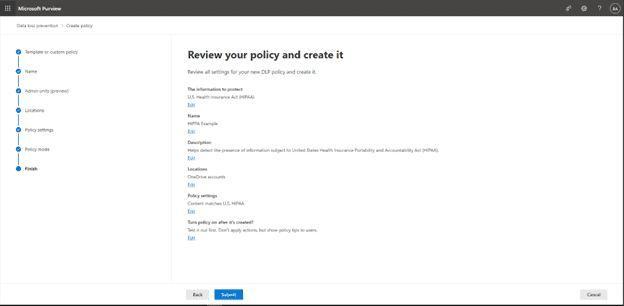
The final screen gives us the option to review all our previous settings, submitting will finalize the policy and start deployment:
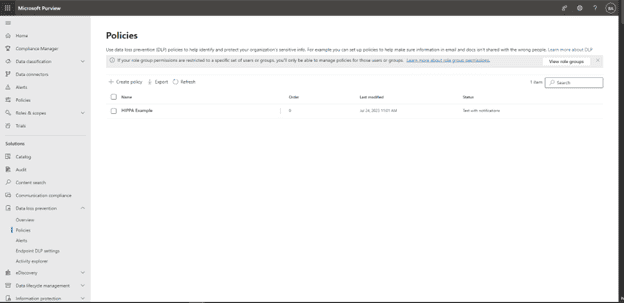
Finally, we see the newly created policy in the main dashboard:
Conclusion
Late in 2022, Microsoft released a new portal with a combined suite of new and old products that can provide strategic organization value for compliance. There are options for granular DLP policies, Device Auditing, and Insider Risk Management Tools. To get access to some features a Microsoft E3 license is required, for all features (minus some add-ons), Microsoft E5 licensing is required. An organization’s data and its security are of the utmost importance in today’s modern age.